What you’ve got to do before starting a DIY project

DIY, Crafting and Upcycling can definitely be trial and error, which a lot of the time turns to spent dollars washing down the drain. I try super hard to research what I can to make sure I use the right tools and processes before I jump into a project. With that said, who has the time to spend hours combing the internet to figure it all out?!

Most recently, I needed to figure out an easy-ish way to paint our new deck we just built (Well my husband really built it, I “managed” that project if you know what I mean) and added some outdoor furnishing like backyard fire pits.

Whether you’re planning a kitchen remodeling project or minor home upgrades, it’s essential to do some research in order to get the outcome you have in your vision. To save you guys some time let me share some of my favorite resources to look before I get going on any given project! Let my resources help you before you dive into the next fun DIY!

Inspiration:

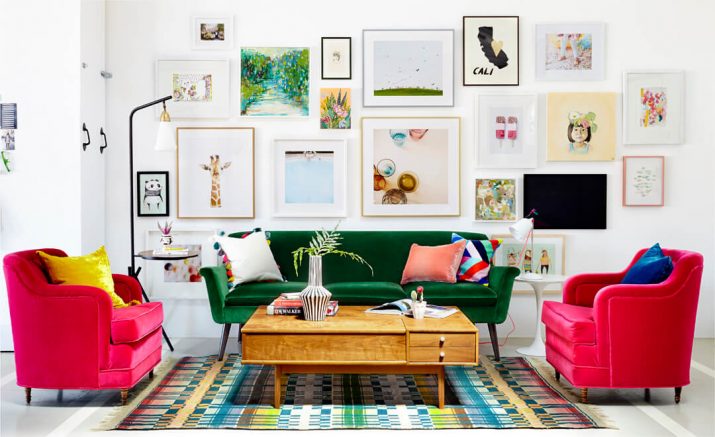
Inspiration for any project you can even imagine in your wildest dreams. Pinterest.

Pinterest Deck Inspiration

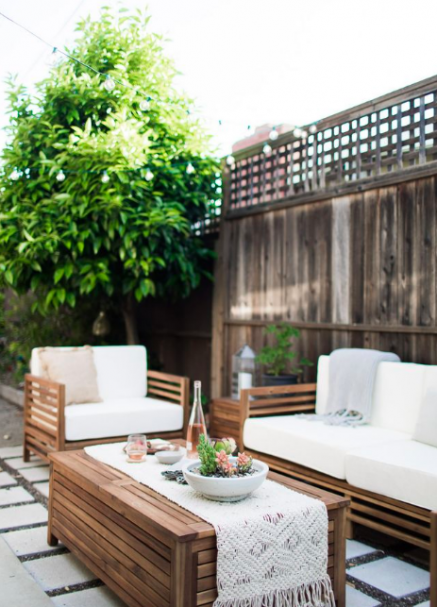
A website that I could scour for hours for inspiration and I totally have. Style By Emily Henderson, so obsessed with her work.

Happy Chapter Inspiration Style by Emily Henderson

Building Plans:

Ana White has countless DIY plans, and they can be found here. Ana White Plans. All the info you need to create something awesome.

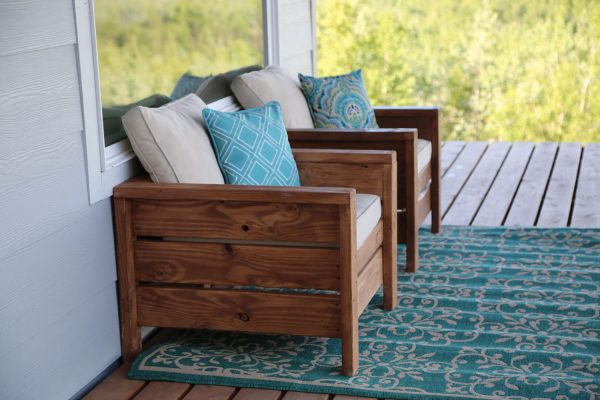
Another good one to get step by step instructions. Jen Wood House.

Happy Chapter Where to find plans

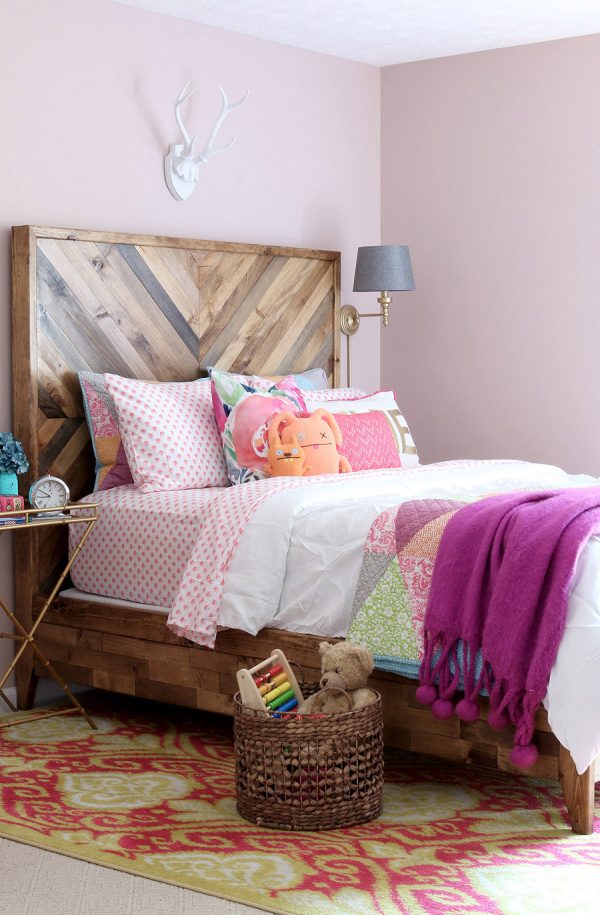
This website is excellent, for plans, inspiration and a TON of info on great tools. This is another I could view for days. Shanty2Chic.

Happy Chapter Inspiration


Tools and Supplies (including paint)

The best resource for reviews for me has been Amazon. Unfortunately, you’ve got to read a lot of reviews to get a good gauge on what is what, but hey, a lot of people actually write honest reviews, so that’s a win.

Recently, I wasn’t getting the info on paint guns that I wanted on my Home Depot and Lowes pages, so I found a page that gives information on all sorts of spray paint guns, tons of info can be found on this page, and that was super helpful for me.

Last but not least, if I had a nickel for every DIY Network episode I watched, well, I’d be a bagillionaire. DIY Network website has all kinds of info on whatever problem, question and wonder you’ve got. I HIGHLY recommend that page.

SO…hopefully that helps you, I’m sure I’ve missed some good ones too! So while you share your newest DIY project below, tell me about your favorite resources too and stay tuned for the painted deck, AHHHHH I’m so excited about it!

Continue Reading

How & Why to Chalk Paint your Bathroom or Kitchen Cabinets

When we moved into our new house, all of the cabinets were in their natural form, no stain or paint. Definitely not anything wrong with that, just not my bag, if you know what I mean. I had to do something to make them mine. Saw these ideas on https://kingstoncabinetry.co.uk/ and definitely needed to try it out for my house.

How and Why to Chalk Paint Cabinets by Happy Chapter

We have these awesome shaker cabinets, so I knew they didn’t need to be replaced, it would just take some DIY painting, and I can handle that! Mark and I spent many moons, like literally 14, painting our kitchen cabinets, sanding, priming, sanding, painting, sanding, painting…you get it. I loved the way they turned out. But that’s not the process I had in mind for our bathrooms. Also think about installing a shower door with 90 degree return panel to get your bathroom more organized and add a fresh look.

We have a little beansprout and I just don’t have a lot of extra time on my hands, so I needed a better solution. I’ve painted a TON of furniture with Chalk Paint, but never cabinets, so I wasn’t sure, and I also wanted to add some paintings and murals from the best Murale Design online to create a good vibe in the room. But I tried it, and SUCCESS!! I have created a fancy little infographic for the process, but I want to share a little more info since these are cabinets and not your regular ol’ furniture project. Here’s how it all went down.

Supplies to Chalk Paint Cabinets by Happy Chapter


1. Annie Sloan Chalk Paint in Paris Grey 2. Wood Filler 3. Wooster Paint Brush 4. Polycrylic 5. Ikea Knobs and Pulls

Step by Step:

  1. Remove all old hardware and fill any holes you won’t need with your replacement hardware.
  2. Sand the wood filler nicely, so its nice and smoooooooth.
  3. Wipe down your cabinets, some of these bathroom and kitchen cabinets have GUNK! I just used Dawn dish soap and warm water on a rag and that did the trick.
  4. Remove the doors from their hinges and pull the drawers out.
  5. PAINT! The first coat
  6. Allow the paint to dry, it dries pretty quickly. I waited about 20 minutes after I finished and began the 2nd coat in the same spot I began last time.
  7. Allow the paint to dry/cure at least 24 hours.
  8. Seal with a clear coat sealant. I wouldn’t suggest wax on cabinets. The wax isn’t the best for wiping and water and all that goodness you experience with bathroom cabinets. I used a Polycrylic, that you paint on. Easy as pie.

How and Why to Chalk Paint Cabinets by Happy Chapter

How and Why to Chalk Paint Cabinets by Happy Chapter

The entire process took like 2 days and that was mostly because I had to let the paint cure. So, why would you want to chalk paint your cabinets? Because it is a quick and cost effective way to make a change. A big awesome change that I made in my bathroom and my kitchen, which was an amazing change as I love cooking all the time with recipes from sites like Kitchenbar.net. I definitely could live without that tile countertop in the bathroom, but the painted cabinets make it way more bearable and I love the bathroom now (especially with the new art I made for the wall)!  Some day a new countertop will happen… Anyway, what do you think? Would you try it?

Continue Reading

Updating a Shared Guest/Children’s Bathroom with DIY Art

Harper shares her bathroom with guests when they come. She is only 1, so luckily that works pretty seamlessly at this point. I had the hardest time figuring what type of art I wanted for her bathroom since I didn’t want the room to be too childish, but not too grown up either, and then! I came across this blog from The Creativity Exchange. This was just the look I needed, something that can grow with Harper, is colorful and can be guest friendly as well.

I essentially followed her instructions, but I didn’t get custom mats. I just went ahead and laid the cut out art on top of the mat and I love the way it turned out, also getting other decoration and mirrors from these modern bathroom mirrors reviews online.

DIY Bathroom Art by Happy Chapter

Our walls are white, I haven’t decided if I am going to keep them that way, but I like the way the gold pops. OK – So here is what I did!

I bought the following supplies:

DIY Calendar Art Supplies by Happy Chapter

Now the easy part. I sprayed each of my Ikea Frames and let them dry. While they were drying, I picked out the 6 images I wanted to use from the calendar and laid them out how I wanted them. I cut them out with a good ol’ pair of scissors. I only had to take some paper off the top and the bottom, the sides were just the length I needed. I measured to make sure each image was about the same size so it looked even. I decided to not get custom mats made because that wasn’t really in my budget. I decided that I would just lay the images on top of the matting so they still had a nice border. I was happy with that look, it wasn’t perfect, but it looked nice. You can baaaaaaarely see the difference in the paper and the mat.

DIY Bathroom and Kids Calendar Art by Happy Chapter

When I was done cutting, I did a second coat of spray paint on the frames. I waited a day for them to dry, because I didn’t want to take any chances. My last step was to frame each print and then I had my husband hang them evenly where I wanted because hey! Hanging things evenly is NOT my strong suit.

Voila! Easy, budget friendly DIY art for Harper’s bathroom, that will be cute for guests too. I love it!

Continue Reading

Easy Breezy Hipster Dog Halloween Costume

Dog Halloween Costume DIY Hipster I Luna B @ Happy Chapter

Year after year I feel like Halloween costumes just get better and more creative. I’ve never been great at coming up with the best Halloween costumes and I think that makes me sort of dread the whole thing. My husband Mark, on the other hand, is a genius and he has the best ideas. Before we had baby Harper, Luna B was our first “dressing up your baby” experience for Halloween. Here’s a little throwback to Luna’s AWARD WINNING (yup!) Hipster Dog Halloween Costume.

Hipster Halloween Dog Costume I Luna B @ Happy Chapter

This costume was super easy to put together. Here’s what we did.

  • Bought a Doggy Jacket from Homegoods (love that place).
  • Bought a children’s sized hat and some baby socks with a shoe print from Target (love that place too!).
  • Hot glued a Pabst Blue Ribbon can to Luna’s jacket as well as a pack of cigarettes, we don’t smoke but one of our friends donated this to us.
  • Snagged an old pair of glasses from a thrift store.

Hipster Halloween Dog Costume I Luna B @ Happy Chapter

Sorry for the blurry iPhone picture. As you can see, Luna wasn’t entirely impressed with the outfit, but we took her to a dog Halloween party at her doggy daycare and she took home 2nd place! I hope this little outfit doesn’t offend anyone, we just had fun with it and thought Luna looked pretty cute. What creative costumes are you using this year or have you seen?

Continue Reading

Obsessed: Refinished Nursery Furniture

Mid Century Painted Dresser by Happy Chapter in Woodland Theme Nursery

Lately I’ve been on a Nursery Furniture kick. I’m loving the fact that we go above and beyond to make the nursery such a warm, cozy and personal environment for our new arriving family members. You know, sometimes the stuff you get at the store just won’t cut it, so you need to create o restore furniture pieces you already have, for this you can Buy Epoxy Resin in Canada with free shipping! and this will help you restore some good pieces of furniture. This week’s obsession is refinished nursery furniture. These are my favorites!
Obsessed: Refinished Nursery Furniture I Happy Chapter

A refinished dresser by Helen Nichole Designs, I’m absolutely in love with this color.


Obsessed: Refinished Nursery Furniture I Happy Chapter

Seriously, how lucky is this little stylish baby that has this gorgeous piece in her room? Unfortunately I couldn’t find the source for this, but it was too cute not to include.


Obsessed: Refinished Nursery Furniture I Happy Chapter
Oooh I’ve been loving this pink blush, and look at this beauty with the classy gold pulls. Redone by Cuckoo4Design. Love.
Obsessed: Refinished Nursery Furniture I Happy Chapter

Bookshelves. Made of drawers. Genius. Addison Meadows Lane details exactly how to get these little gems made too!


Mid Century Painted Dresser by Happy Chapter in Woodland Theme Nursery

I mean if I’m including my favorite, I have to include my last few nursery projects as well, right!? Luci’s MCM Dresser.

Custom Ikea Dresser redo by Happy Chapter

And Harper’s Custom IKEA Dresser that I made for her sassy nursery.

There is just something wonderful about a nursery. Ahhhh, babies! Am I right?

Continue Reading

Customizing IKEA furniture: A Sweet Chic Dresser for Our Baby Girl

Custom Ikea Dresser redo by Happy Chapter

When Mark and I found out we were having a baby girl, we couldn’t have been more excited! As soon as we found out, the nursery ideas began a-flowin’ and I was out of control. I knew I wanted her to have a piece that no one else would have and that’s where I started brainstorming and pinning up a storm. I came across this photo from Sarah Sherman Samuel and was sold.

Ikea Custom Dresser Inspiration

I wanted to do something like this for our sweet baby Harper. Her bedroom colors were roughly, Soft Pink, Mint, Gold, White and Grey. I thought a white dresser with touches of gold could be timeless and something she could use for years to come. So out we went to our nearest IKEA and snatched up the Tarva Dresser. I’ll tell you what, this sucker is not an easy build…well that’s what Mark said at least, but hey, it’s spacious, it’s the size I needed, and it’s going to be stinkin’ cute. So you do what you have to do! We were amazed by the variety TV Bed Store has on furniture styles and more.

We picked out our paint, we picked out our drawer pulls and we were good to go! Having a cluttered and disorganized bedroom closet adds stress and takes time away from your busy days. Whether you need more closet space or just want to find things in your messy bedroom closets, storage cabinet amazon will help transform your space and comfortable bed pillows make the difference. Beautiful design can blend with function when one of our designers helps recommend the right accessories.

Custom Ikea Dresser redo by Happy Chpater

The dresser comes with some thick knobs, but we wanted to add our own touch, so I started by wood filling the holes and we would drill our own holes for the pulls I got later. Finding reliable storage spaces might be a little tricky for you, especially when you are looking forward to store antiques and possessions in a self storage unit. However, there are many self storage facilities that provide you the luxury of choosing a storage unit of your choice, and become free of all worries.

While building the dresser, we did not put the bottom piece on until the end, for two reasons.

  1. We thought the legs were a little too long and we wanted to shorten them up, so Mark cut them down about 2 inches.
  2. I sprayed the entire bottom piece with the Pure Gold spray paint to give it that sort of “dipped” look.

Because I wanted this to be super smooth, we (Mark) sanded it with a 180 grit sandpaper to make it smooth enough to prime. I was preggars, so I did the design on this one and Mark did the hard work. After we sanded, we used a fairly heavy primer because sometimes when you are working with wood like this and white paint, the wood coloring can seep through over time. We used Zinsser B.I.N. primer in white. We sprayed 2 coats of primer and 2 coats of paint with our trusty Graco Truecoat Plus II and the finish was SMOOOOOOTH. We did sand in between with a 220 grit paper, which is a pretty important step if you want it to be buttery smoooooth.

Super excited about the way it turned out.

ikearedonedresser

Custom Ikea Dresser redo by Happy Chapter

Custom Ikea Dresser redo by Happy Chapter

And now our little angel baby cakes has a custom dresser she can use for years!


Continue Reading

To Paint or Not to Paint? A Mid Century Modern Dresser fit for a Princess

Mid Century Painted Dresser by Happy Chapter

When I saw this dresser at a garage sale, I’d felt like I won the lottery. I guess I’m a sucker for old beat up stuff. Please don’t hate me for painting this beauty, but I saw it and I had a vision.

A Midcentury Dresser Before redo by Happy Chapter

The dresser wasn’t in the greatest shape and needed some love. I needed to refill some areas, and there was plenty of torn veneer, so it would have been quite a mission, not to mention pretty expensive, to restore it to the original look anyway. I love commas. ANYWAY…I was a little uncertain about using chalk paint on something mid century modern, but I was looking for a flat matte look and knew the ol’ Annie Sloan chalk paint would do the trick. Plus HEY! No Sanding, No Priming. I’m in!

After I cleaned and filled holes and any damaged areas with wood filler, I used Annie Sloan chalk paint in Old White using this step by step painting process. Next, I shined up the original drawer pulls, but decided they needed an extra umph! and painted them with Rustoleum Metallic spray paint in Pure Gold to match some super sleek square knobs I found for the top drawer. I’m in love with the final look.

Mid Century Painted Dresser by Happy Chapter

Mid Century Painted Dresser by Happy Chapter

A very close friend of mine purchased this piece for her little girl’s “A Woodland” themed nursery and it looked just perfect in there. Take a look at this interior painting Mckinney company that can help you out with the best quality materials.

Mid Century Painted Dresser by Happy Chapter in Woodland Theme Nursery

So tell me, would you do it? Do you think you could paint an oldie like this?

Continue Reading

A Mid Century Modern Table Refinished – The Stories a Piece Holds

Mid Century Modern Dining Table

One of the things I love most about my job is that people come to me with these super unique pieces that have been in their families for eons. For the most part, they want to keep the integrity of the piece, but want to update it a bit to fit their style or just bring it back to life. It’s really an honor to get to work on a piece like that. I just can’t but help think about the happy family dinners a dining table has been a part of, or how many favorite books, toys or family photos a bookshelf has held. I love the history of these pieces and being able to restore them to their next chapter of life is such a pleasure for me!

A Mid Century Modern Dining Table Before

Mid Century Modern Table Before 2

This mid century modern dining table was one of the most fun projects I’ve worked on.  For starters, the story of this beauty is that it was once the childhood table of a friend of ours. She was ready to part with it and was going to sell it in a garage sale. Well, another close friend of ours, stopped by the sale and said something along the lines of  – Whoa! you’re selling that?! What a great piece, that would be great for our family table. So, he took it, and that’s where I come in. A gorgeous table ready for it’s next Happy Chapter with a wonderfully cute family.

Mark , my sweet husband helped me quite a bit with this table because:

  1. It’s like he can’t stand still.
  2. It was such a cool piece, he had to have his hands on the power tools to get it perfect.

We started by sanding the table down to remove all of the stain and love (like crayon/marker marks etc.) We started with a 150 grit to remove the stain and then sanded with a 100 grit paper to smooth it out and prep for the staining process. The wood was phenomenal under the stain, it was just the softest natural wood I’ve worked on.

A Mid Century Modern Dining Table refinished by Happy Chapter East Dallas

Mid Century Modern Table Sanded 2

Mid Century Modern Table Sanded 3

The wood was so soft, we definitely needed to use Minwax Wood Conditioner before we put the stain on, the wood conditioner helps to prep the wood so it will take the stain evenly.  I really recommend using this anytime you stain a piece, it’s a quick step that really makes the difference with the result of the finished project. Just apply the wood container with a synthetic brush and it’ll just soak right in.

As you can see in the before pics, the natural wood was a variety of colors. My customer had requested that the stain was natural, so I checked with her to see if she liked the difference in the colors. She loved it, so we continued on the natural route, which I’m so glad we did. This table was absolutely gorgeous natural. We stained the table with “Natural,” a Minwax Oil Based Stain. The table looked great and now we were ready to poly. This is where we hit a bump in the road.

I won’t bore you with the details, but basically this wood was so soft, the typically poly we would use for a dining table would not soak correctly and it made a terrible uneven finish – so we had to go to plan B. Plan B first consisted of starting over – Doh! We had to go all the way back to step one. After re-sanding, re-conditioning, and re-staining we were ready to “test” some new finishing products. After testing, and waiting, testing and waiting we went with Varathane’s Matte Poly. This stuff was like magic, but it did take close to 5 coats to make sure the dining table would be sufficiently protected. This particular poly did not have the amber tint most poly’s have, so it really let the “Natural” finish stand out. See the smooth finish. Note: this stuff is hard to find in store, so lately I’ve had to order from Amazon.

A Mid Century Modern Dining Table refinished by Happy Chapter East Dallas

The beautiful table was finally ready for it’s new life. Ready to be the spot where the family sits for hours, laughs and tells stories about their day. The table where homework will get done and college apps will be filled out. I can’t help but be proud to be a mini part of that.

Mid Century Modern Dining Table

A Mid Century Modern Dining Table

Mid Century Modern Table - 3

* Photo Credit for “After” Photos – Eddy Badrina

Continue Reading

Personalize by Painting Veneer, Laminate or IKEA Furniture

How To Paint Laminate, Veneer or IKEA furniture with Happy Chapter

It is always exciting to take on new projects, even if I’ve never done that type of piece before, I always know I’m going to learn A LOT! When I took on a big bad laminate bookshelf, I had NO idea how difficult it was going to be, it’s just a little ol’ bookshelf right? NO! So I thought I’d write about my experience to save you the trouble. Painting veneer, laminate and IKEA furniture is actually pretty easy, there are just a few things to know and it’ll be a golden experience. I mean who doesn’t want to personalize your mass made furniture to make it your own? Well it’s easy stuff – first thing is first, make sure you have the right supplies.

Zinsser Primer

  • I use this Zinsser B.I.N. primer, it can be used under oil or latex paints and is exactly what you need to get the paint to adhere well to your piece. I would highly recommend this particular primer. It seems pretty watery, and dries super fast, but it seriously holds the paint.
  • Use a fairly fine sandpaper, I used 180 grit and then 220. You aren’t trying to take the color/finish off of the furniture but you do want to scuff it a tad to get the paint to adhere.
  • And finally, your choice of painting applicator (how will you apply the paint) I used a roller, and a spray gun.

How To Paint Laminate, Veneer or IKEA furniture with Happy Chapter

  1. As always, wipe down your piece of furniture and remove any hardware that you don’t want painted.
  2. Get to scuffing! Using your 180 grit sandpaper, scuff up the piece. Try to get most of the piece evenly sanded – this will help your primer adhere to the smooth surface and will prevent chipping in the future. The picture below shows how the sanding will create a little bit of dust on your piece, but you aren’t going to be removing any of the finish, we will be painting over all that.
  3. Sanded BookshelfAfter you’ve sanded the entire thing, wipe the piece down with a damp cloth to get rid of all that dust.
  4. Prime. Using the Zinsser B.I.N. primer, paint or roll on the primer. This stuff dries quickly, so work fast and try to make your strokes as even as possible. The more uneven, the more visible the primer will be through your first coat of paint. Which reminds me, this particular primer can be tinted! Yup, how awesome so if you are using a darker color, just have the hardware store tint your primer so you don’t have to worry about white showing through (although tinting is not necessary, it does make it easier).
  5. Once your primer is dry you can use your 220 grit sandpaper to sand down the entire piece. Note that you aren’t trying to remove any of the primer, you are just lightly sanding to give your piece that “smooth-to-the-touch-feel.” Get it nice and smooth and wipe off any dust that sanding has created.
  6. Whoo hoo! Now you can paint. Remember, you have choices here, you can spray your paint with a spray gun, use a nice brush (one that goes with the type of paint you are using) or you can use a roller. I prefer a spray guy. I use the Graco Truecoat Plus II and I LOVE it!
  7. Do a few coats, allowing your paint to dry the recommended amount of time in between coats.

Here is the final bookshelf – I know it seems weird to just paint it white, but this particular piece matched my customer’s wall perfectly, so it looked like it was a built in, it turned out really nice.

Final Bookshelf

and smooth!

Smooth Shelf

I also used the exact same steps to personalize a dog bowl for some of our great friends. I love how their sweet dog Cin Cin now has a custom bowl that is like no other!

Cin Cin Bowl Before

Cin Bowl After2

Cin Bowl After

I’d love to see some pics from some of the furniture you’ve personalized with paint!!

Continue Reading