A Glossy Painted Desk

Vintage Desk redone to a Glossy Hollywood Regency style

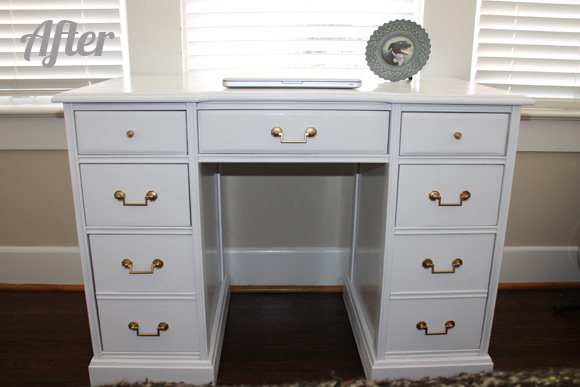
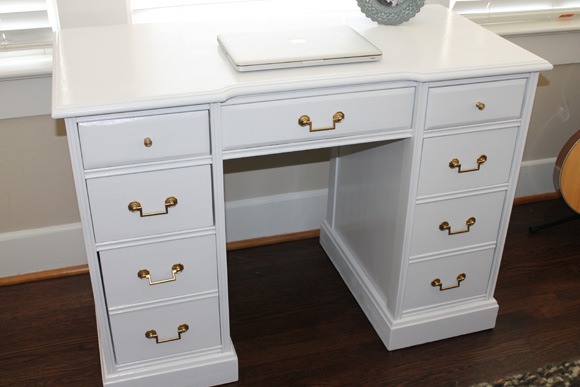
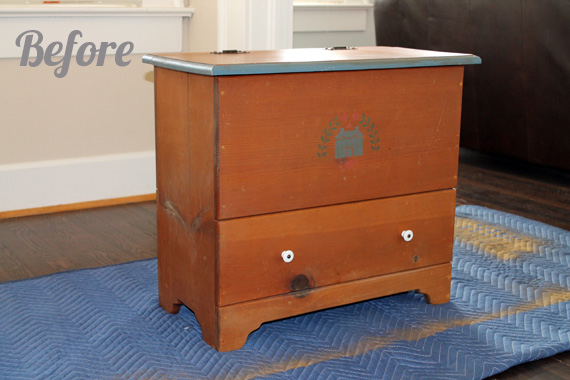
OK OK, I’m on a glossy furniture kick, I just have this attraction to these shiny lacquered looks and I just want to recreate them over and over again. Lucky for me, I found this awesome desk at a garage sale in my neighborhood and as soon as I saw the lines on it, I knew exactly what I wanted to do with it.

Glossy Painted Desk Before Image

The desk kind of reminded me of a piece of furniture I had pinned from Z Gallerie. I loved how it kind of had that Hollywood Regency look to it. I was drawn to these images and knew this desk could pull this look off!

Z Gallerie Dresser

Z Gallerie Styled Room

The desk had a super dark stain and had this terribly thick waxy sealant on it, so the sanding job was a nightmare, but I got through it. I had to get a circular sander, but it made the project move along much faster. 

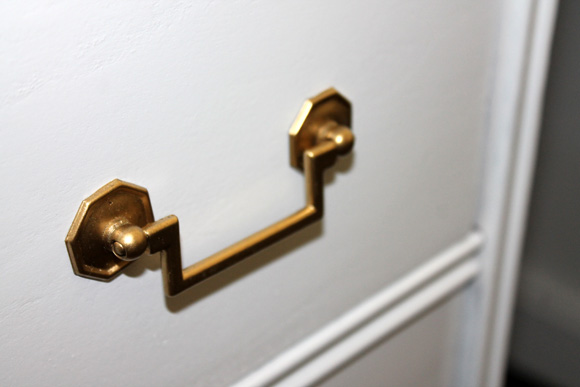
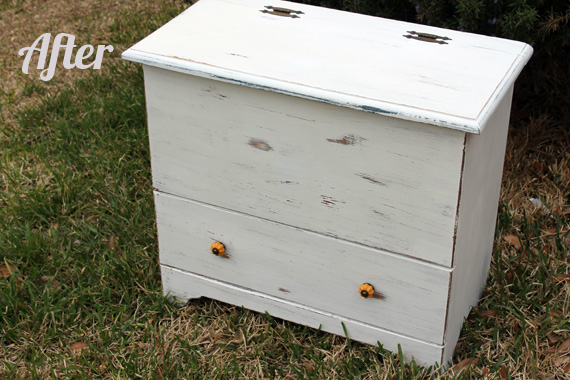
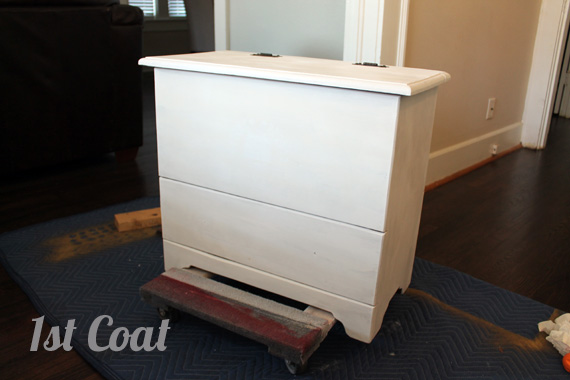
After sanding, I used my spray gun (The Critter) and painted on a gorgeous bright white oil based paint from Rustoleum. It took what felt like millions, but was actually only 3 coats to make it look as glossy and smooth as I wanted. I used a 220 grit sanding block in between coats to make sure I got it as smooth as possible; the circular sander can be pretty rough on furniture and softer woods. I decided to use the old hardware because I thought it was still pretty cute, I just sprayed it with a brass spray paint and I like the end look. If you know anything about oil paint, it’s that it takes a reeeeeeally long time to dry! So this project took forever, but I am so happy with it, I think I may keep the desk to put in our guest bedroom. If you have back, hip, neck or shoulder issues, a body pillow amazon can help you find pressure relief by offering extra support. Body pillows can also help you fall asleep faster by easily helping you find that perfect sleep position.

Vintage Desk redone to a Glossy Hollywood Regency style

Vintage Desk Drawer Pull

Vintage Desk, Glossy Top

Vintage Desk


Continue Reading

The Annie Sloan Chalk Paint Revolution – What’s this about?

I don’t know about you, but I have been hearing raves and praises about Annie Sloan Chalk Paint quite frequently, so I was over the moon when a girlfriend of mine commissioned me for a “Shabby Chic Distressed Trunk.” From what I have heard, this chalk paint would be just the right way to create the exact look she was going for.

This paint is sold all over; the website has a list of locations. It is a bit pricey so expect to pay a little more than normal for paint, but when you consider all the time you save by not sanding, or prepping, or priming, you’re probably coming out even, or actually a little bit ahead! Yes, that’s right, no sanding…whoo hoo!!

Here’s what you need:

  • Annie Sloan Chalk Paint in Pure White
  • Any paint brush of your choice. I used this one I already had on hand.
  • A color free, lint free cloth. You can buy some or use an old t-shirt (I like the t-shirts).
  • Annie Sloan Clear Wax. She also makes a Dark Wax, which will give a completely different look.
  • Sandpaper for distressing (I used 80 grit, but that really depends on how much you want to distress)

Before Trunk

Step by Step:

  1. Wipe down piece and remove all hardware.
  2. Paint! The paint goes on super smooth and goes a long way. Annie Sloan recommends 1 1/2 coats, so you may see some brush strokes and bleed through on first coat. The paint takes about 15 or so minutes to dry, so I was able to move right into my second coat. 1st Coat
  3. Once the 2nd coat is dry – Wax with clear wax. The wax is wonderful, it’s like Crisco. I applied a small amount in a circular motion with one side of my t-shirt and then wiped it off in the same direction of brush strokes with the dry side of my t-shirt. Don’t go crazy with the wax, a little is all you need, Annie Sloan says to think about it like  putting lotion on, not too much and you want it to soak in.
  4. Distress, love this part. I waited for the wax to dry 24 hours before distressing. Then you just sand in places where natural distressing would happen and then anywhere you want for the look you are going for. Wipe off all dust afterwards.
  5. Last Step! Wax again! This is just to make sure that your piece remains protected for many moons. Let sit 24 hours before you start use of your piece. This is also where you would apply the Dark wax if you decided to use that one.

Voila! There you go. Check out this fun trunk. I definitely see more Annie Sloan paint projects in my future!

Annie Sloan Pure White Chalk Paint Shabby Chic Trunk


Continue Reading