How & Why to Chalk Paint your Bathroom or Kitchen Cabinets

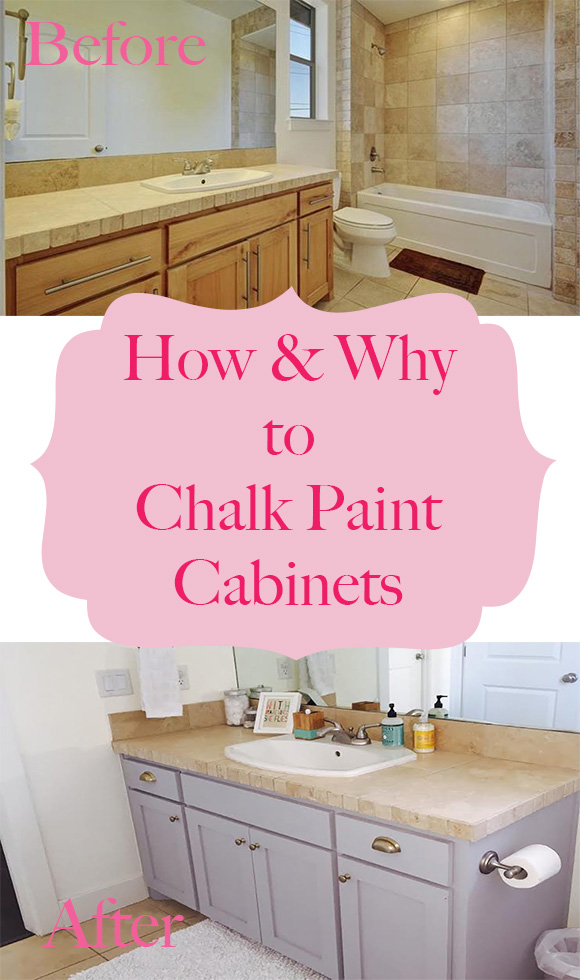
When we moved into our new house, all of the cabinets were in their natural form, no stain or paint. Definitely not anything wrong with that, just not my bag, if you know what I mean. I had to do something to make them mine. Saw these ideas on https://kingstoncabinetry.co.uk/ and definitely needed to try it out for my house.

How and Why to Chalk Paint Cabinets by Happy Chapter

We have these awesome shaker cabinets, so I knew they didn’t need to be replaced, it would just take some DIY painting, and I can handle that! Mark and I spent many moons, like literally 14, painting our kitchen cabinets, sanding, priming, sanding, painting, sanding, painting…you get it. I loved the way they turned out. But that’s not the process I had in mind for our bathrooms. Also think about installing a shower door with 90 degree return panel to get your bathroom more organized and add a fresh look.

We have a little beansprout and I just don’t have a lot of extra time on my hands, so I needed a better solution. I’ve painted a TON of furniture with Chalk Paint, but never cabinets, so I wasn’t sure, and I also wanted to add some paintings and murals from the best Murale Design online to create a good vibe in the room. But I tried it, and SUCCESS!! I have created a fancy little infographic for the process, but I want to share a little more info since these are cabinets and not your regular ol’ furniture project. Here’s how it all went down.

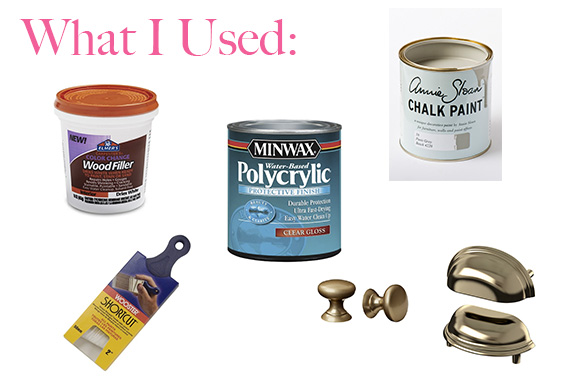
Supplies to Chalk Paint Cabinets by Happy Chapter


1. Annie Sloan Chalk Paint in Paris Grey 2. Wood Filler 3. Wooster Paint Brush 4. Polycrylic 5. Ikea Knobs and Pulls

Step by Step:

  1. Remove all old hardware and fill any holes you won’t need with your replacement hardware.
  2. Sand the wood filler nicely, so its nice and smoooooooth.
  3. Wipe down your cabinets, some of these bathroom and kitchen cabinets have GUNK! I just used Dawn dish soap and warm water on a rag and that did the trick.
  4. Remove the doors from their hinges and pull the drawers out.
  5. PAINT! The first coat
  6. Allow the paint to dry, it dries pretty quickly. I waited about 20 minutes after I finished and began the 2nd coat in the same spot I began last time.
  7. Allow the paint to dry/cure at least 24 hours.
  8. Seal with a clear coat sealant. I wouldn’t suggest wax on cabinets. The wax isn’t the best for wiping and water and all that goodness you experience with bathroom cabinets. I used a Polycrylic, that you paint on. Easy as pie.

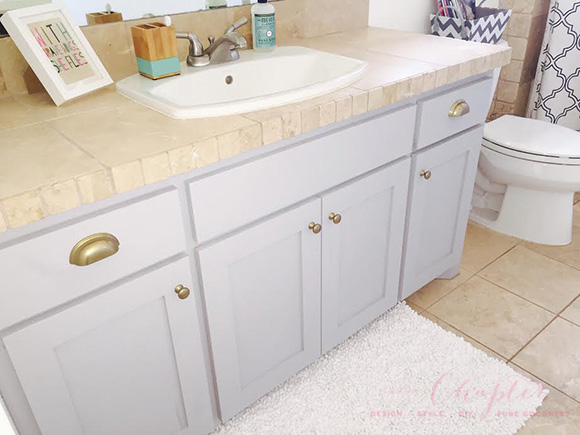
How and Why to Chalk Paint Cabinets by Happy Chapter

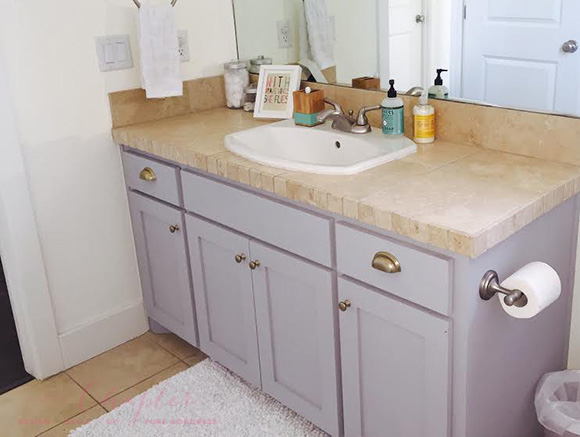
How and Why to Chalk Paint Cabinets by Happy Chapter

The entire process took like 2 days and that was mostly because I had to let the paint cure. So, why would you want to chalk paint your cabinets? Because it is a quick and cost effective way to make a change. A big awesome change that I made in my bathroom and my kitchen, which was an amazing change as I love cooking all the time with recipes from sites like Kitchenbar.net. I definitely could live without that tile countertop in the bathroom, but the painted cabinets make it way more bearable and I love the bathroom now (especially with the new art I made for the wall)!  Some day a new countertop will happen… Anyway, what do you think? Would you try it?

Continue Reading

Updating a Shared Guest/Children’s Bathroom with DIY Art

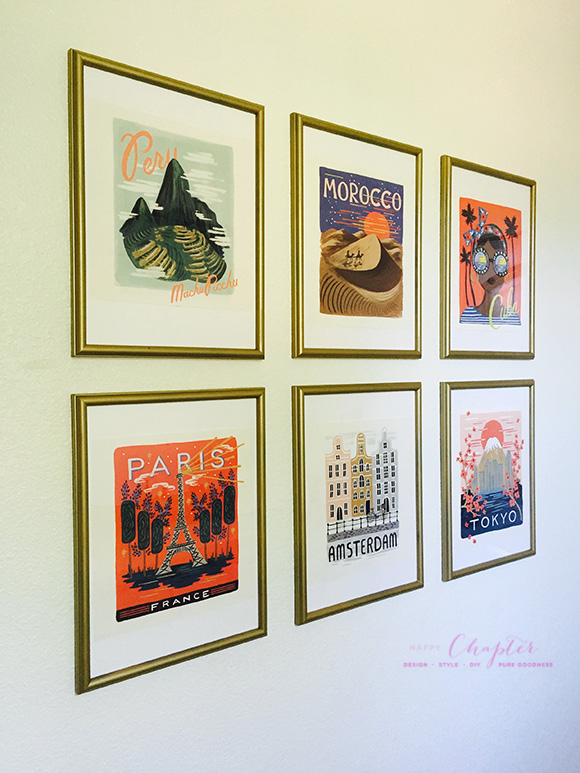
Harper shares her bathroom with guests when they come. She is only 1, so luckily that works pretty seamlessly at this point. I had the hardest time figuring what type of art I wanted for her bathroom since I didn’t want the room to be too childish, but not too grown up either, and then! I came across this blog from The Creativity Exchange. This was just the look I needed, something that can grow with Harper, is colorful and can be guest friendly as well.

I essentially followed her instructions, but I didn’t get custom mats. I just went ahead and laid the cut out art on top of the mat and I love the way it turned out, also getting other decoration and mirrors from these modern bathroom mirrors reviews online.

DIY Bathroom Art by Happy Chapter

Our walls are white, I haven’t decided if I am going to keep them that way, but I like the way the gold pops. OK – So here is what I did!

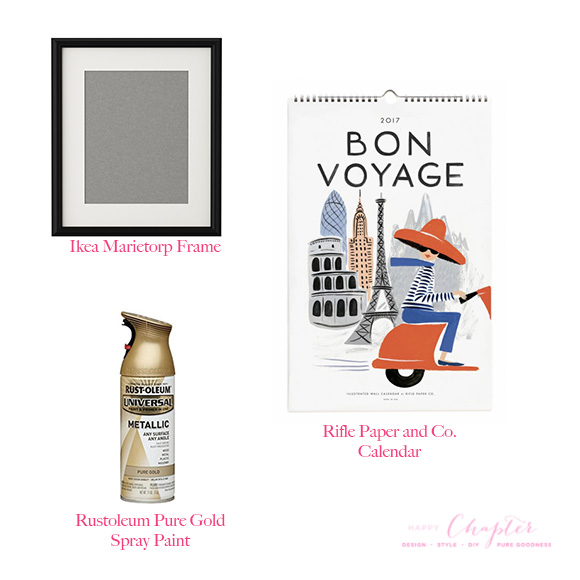
I bought the following supplies:

DIY Calendar Art Supplies by Happy Chapter

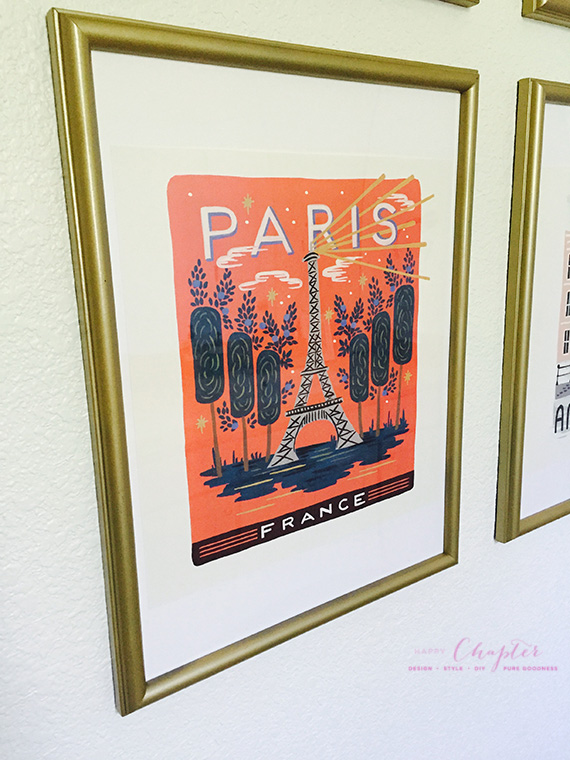
Now the easy part. I sprayed each of my Ikea Frames and let them dry. While they were drying, I picked out the 6 images I wanted to use from the calendar and laid them out how I wanted them. I cut them out with a good ol’ pair of scissors. I only had to take some paper off the top and the bottom, the sides were just the length I needed. I measured to make sure each image was about the same size so it looked even. I decided to not get custom mats made because that wasn’t really in my budget. I decided that I would just lay the images on top of the matting so they still had a nice border. I was happy with that look, it wasn’t perfect, but it looked nice. You can baaaaaaarely see the difference in the paper and the mat.

DIY Bathroom and Kids Calendar Art by Happy Chapter

When I was done cutting, I did a second coat of spray paint on the frames. I waited a day for them to dry, because I didn’t want to take any chances. My last step was to frame each print and then I had my husband hang them evenly where I wanted because hey! Hanging things evenly is NOT my strong suit.

Voila! Easy, budget friendly DIY art for Harper’s bathroom, that will be cute for guests too. I love it!

Continue Reading

An Updated Fireplace

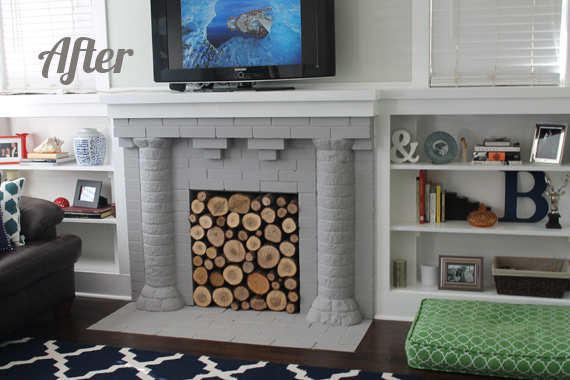
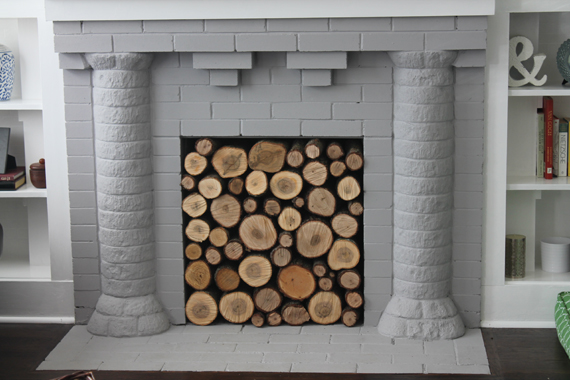
Fireplace filled with wood logs

So, Mark and I purchased our house this past July. We have made the most of 2013 updating as much as we can with our crazy (seriously crazy) DIY skills. We call it DIYR – Do It Yourself RIGHT. That’s just what we do folks, we crack ourselves up. We’ve got a 1920’s craftsmen home and we have a pretty cool fireplace that does not work anymore. It’s too cool to just rip it out, so with a little inspiration from Pinterest and some winter catalogs, we came up with this.

Fireplace Before

Fireplace filled with wood logs

Fireplace filled with wood logs

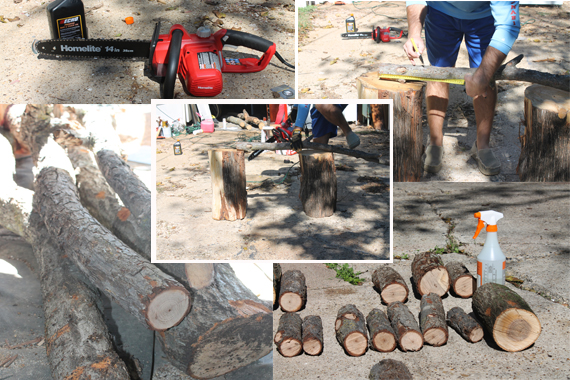
I’m totally in love. It really makes the room feel cozy. The whole project only took us an afternoon. Mark and I went to a local lumber yard and got a few logs for $8! Yup, that made me pretty happy…and then he cut them into 8-10″ little logs using his trusty chainsaw – such a manly man. I sprayed them with a bleach and water mixture and once they dried I brought them in.

Fireplace Log Project Step by Step

Then I just played with the arrangement (it was sort of a fun little puzzle) until I liked the way it looked and Voila! An updated fireplace! What do you think? What kinds of fun do you have going on in your fireplace? I love pics…

Continue Reading