Obsessed: 9 Baby Eating Essentials

9 Baby Eating Essentials When Your Baby Starts Solids I Happy Chapter

I’m starting out my “Obsessed” series with 9 Baby Eating Essentials that I love. Harper wasn’t really into the whole eating thing and let me tell ya…it stressed me out. She was offered solids at 6 months and wouldn’t accept them until 10.5 months, yes you read that right. So if you are currently in this situation and worrying, don’t. Keep trying, but don’t stress. Save yourself the sanity. in case you want to expand your cooking options you can always take a look at the Goodfoodblogph online catalog.

ANYWHO, she eats and drinks whole milk now and there are some pretty cool things out there that we love so I thought I’d share.


Just a note: the ezpz Happy Mat does not fit on the IKEA highchair well, and it doesn’t stay. We use the mat at the table and when we eat out from time to time. The IKEA highchair is a breeze to wipe down, it isn’t a bit fancy, but it does the job! Lastly, the Contigo waterbottle can be a bit heavy to start out with, but once your little one gets the hang of the straw and can lift it, it’s a great non leaking sippy! (you can sometimes find them at Costco as well.)

What are your favorite, can’t live without eating essentials? I mean there HAS to be more cool fun little things to try!


Continue Reading

A Mid Century Modern Table Refinished – The Stories a Piece Holds

Mid Century Modern Dining Table

One of the things I love most about my job is that people come to me with these super unique pieces that have been in their families for eons. For the most part, they want to keep the integrity of the piece, but want to update it a bit to fit their style or just bring it back to life. It’s really an honor to get to work on a piece like that. I just can’t but help think about the happy family dinners a dining table has been a part of, or how many favorite books, toys or family photos a bookshelf has held. I love the history of these pieces and being able to restore them to their next chapter of life is such a pleasure for me!

A Mid Century Modern Dining Table Before

Mid Century Modern Table Before 2

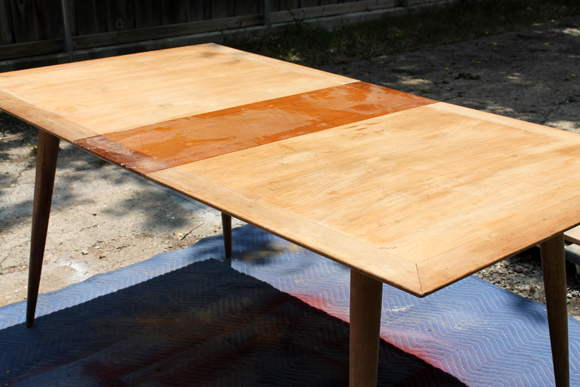
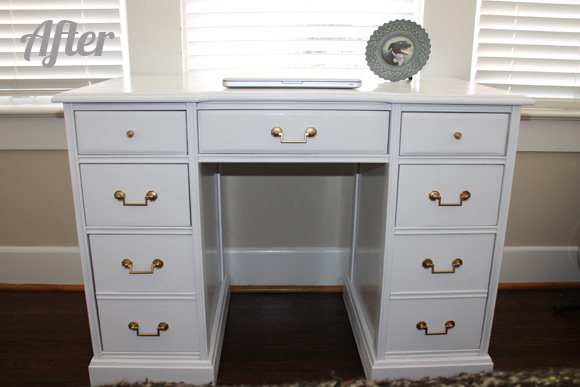
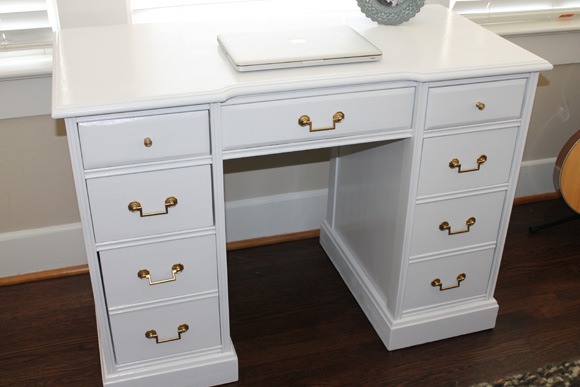
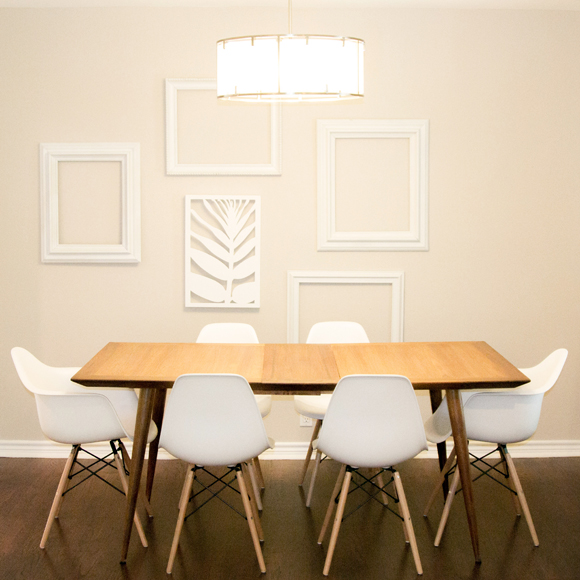
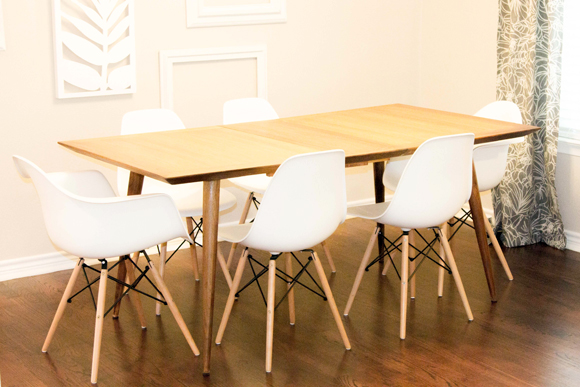
This mid century modern dining table was one of the most fun projects I’ve worked on.  For starters, the story of this beauty is that it was once the childhood table of a friend of ours. She was ready to part with it and was going to sell it in a garage sale. Well, another close friend of ours, stopped by the sale and said something along the lines of  – Whoa! you’re selling that?! What a great piece, that would be great for our family table. So, he took it, and that’s where I come in. A gorgeous table ready for it’s next Happy Chapter with a wonderfully cute family.

Mark , my sweet husband helped me quite a bit with this table because:

  1. It’s like he can’t stand still.
  2. It was such a cool piece, he had to have his hands on the power tools to get it perfect.

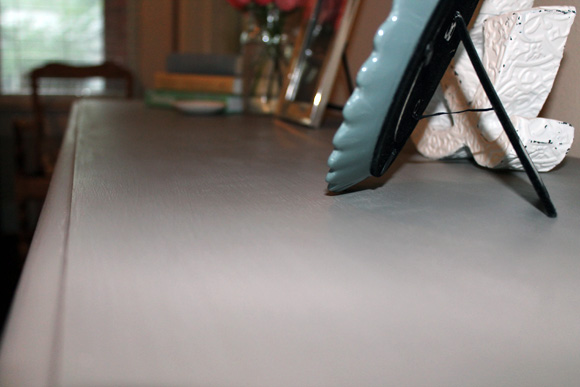
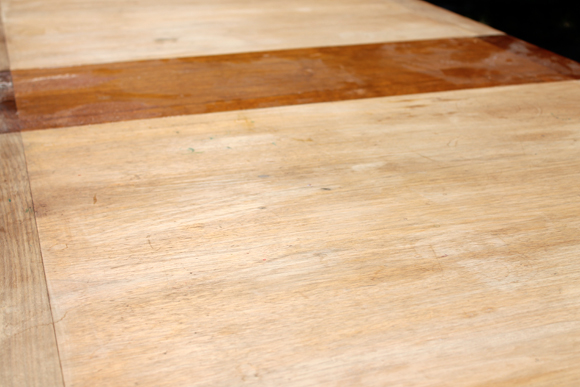
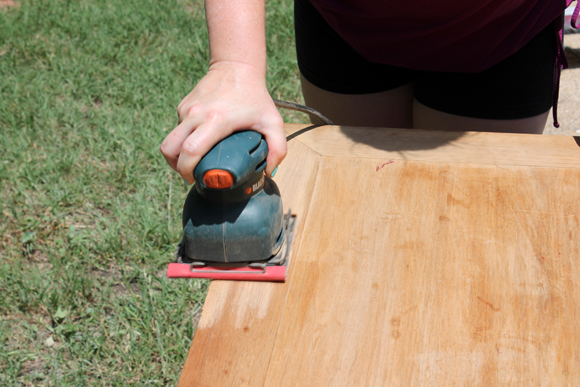
We started by sanding the table down to remove all of the stain and love (like crayon/marker marks etc.) We started with a 150 grit to remove the stain and then sanded with a 100 grit paper to smooth it out and prep for the staining process. The wood was phenomenal under the stain, it was just the softest natural wood I’ve worked on.

A Mid Century Modern Dining Table refinished by Happy Chapter East Dallas

Mid Century Modern Table Sanded 2

Mid Century Modern Table Sanded 3

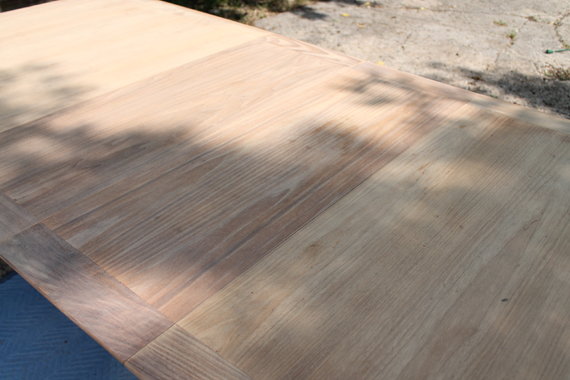
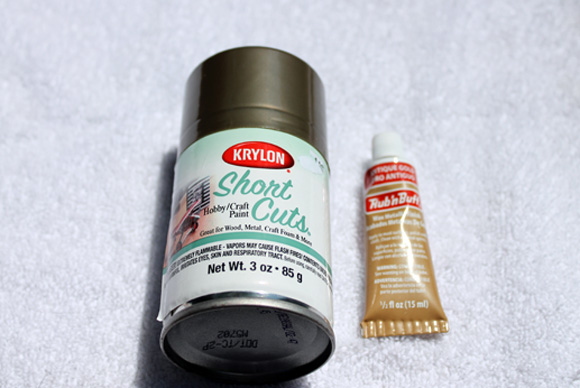
The wood was so soft, we definitely needed to use Minwax Wood Conditioner before we put the stain on, the wood conditioner helps to prep the wood so it will take the stain evenly.  I really recommend using this anytime you stain a piece, it’s a quick step that really makes the difference with the result of the finished project. Just apply the wood container with a synthetic brush and it’ll just soak right in.

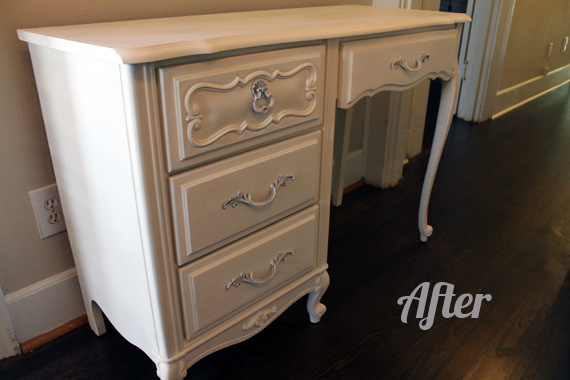
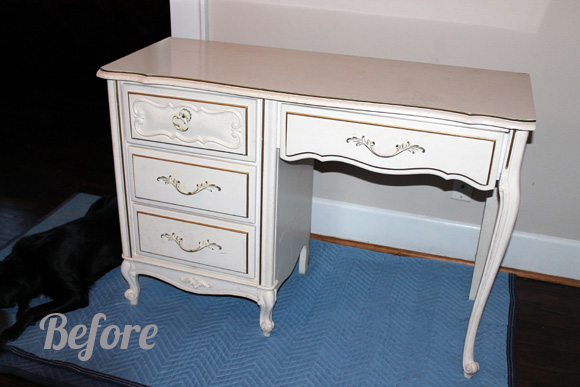
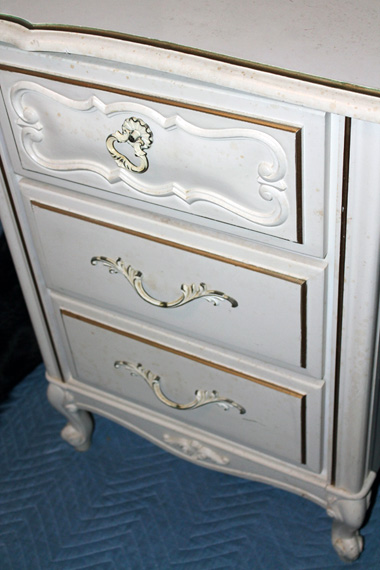
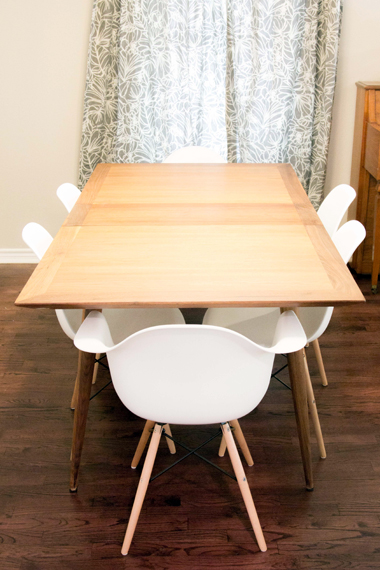
As you can see in the before pics, the natural wood was a variety of colors. My customer had requested that the stain was natural, so I checked with her to see if she liked the difference in the colors. She loved it, so we continued on the natural route, which I’m so glad we did. This table was absolutely gorgeous natural. We stained the table with “Natural,” a Minwax Oil Based Stain. The table looked great and now we were ready to poly. This is where we hit a bump in the road.

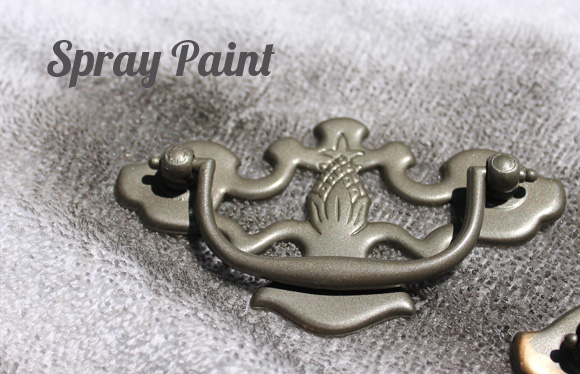
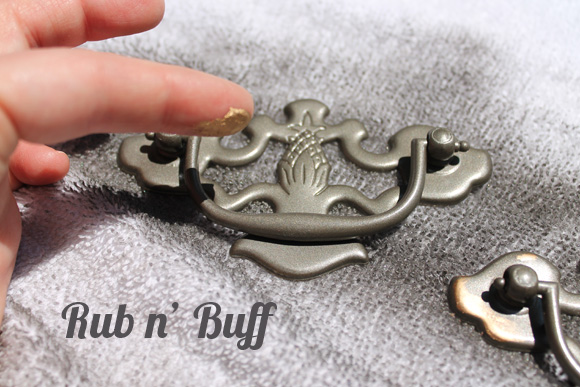
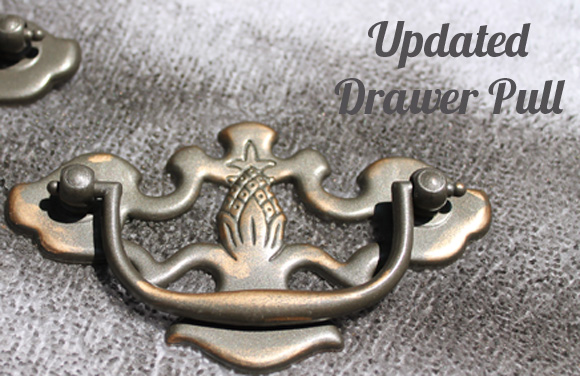
I won’t bore you with the details, but basically this wood was so soft, the typically poly we would use for a dining table would not soak correctly and it made a terrible uneven finish – so we had to go to plan B. Plan B first consisted of starting over – Doh! We had to go all the way back to step one. After re-sanding, re-conditioning, and re-staining we were ready to “test” some new finishing products. After testing, and waiting, testing and waiting we went with Varathane’s Matte Poly. This stuff was like magic, but it did take close to 5 coats to make sure the dining table would be sufficiently protected. This particular poly did not have the amber tint most poly’s have, so it really let the “Natural” finish stand out. See the smooth finish. Note: this stuff is hard to find in store, so lately I’ve had to order from Amazon.

A Mid Century Modern Dining Table refinished by Happy Chapter East Dallas

The beautiful table was finally ready for it’s new life. Ready to be the spot where the family sits for hours, laughs and tells stories about their day. The table where homework will get done and college apps will be filled out. I can’t help but be proud to be a mini part of that.

Mid Century Modern Dining Table

A Mid Century Modern Dining Table

Mid Century Modern Table - 3

* Photo Credit for “After” Photos – Eddy Badrina

Continue Reading

Personalize by Painting Veneer, Laminate or IKEA Furniture

How To Paint Laminate, Veneer or IKEA furniture with Happy Chapter

It is always exciting to take on new projects, even if I’ve never done that type of piece before, I always know I’m going to learn A LOT! When I took on a big bad laminate bookshelf, I had NO idea how difficult it was going to be, it’s just a little ol’ bookshelf right? NO! So I thought I’d write about my experience to save you the trouble. Painting veneer, laminate and IKEA furniture is actually pretty easy, there are just a few things to know and it’ll be a golden experience. I mean who doesn’t want to personalize your mass made furniture to make it your own? Well it’s easy stuff – first thing is first, make sure you have the right supplies.

Zinsser Primer

  • I use this Zinsser B.I.N. primer, it can be used under oil or latex paints and is exactly what you need to get the paint to adhere well to your piece. I would highly recommend this particular primer. It seems pretty watery, and dries super fast, but it seriously holds the paint.
  • Use a fairly fine sandpaper, I used 180 grit and then 220. You aren’t trying to take the color/finish off of the furniture but you do want to scuff it a tad to get the paint to adhere.
  • And finally, your choice of painting applicator (how will you apply the paint) I used a roller, and a spray gun.

How To Paint Laminate, Veneer or IKEA furniture with Happy Chapter

  1. As always, wipe down your piece of furniture and remove any hardware that you don’t want painted.
  2. Get to scuffing! Using your 180 grit sandpaper, scuff up the piece. Try to get most of the piece evenly sanded – this will help your primer adhere to the smooth surface and will prevent chipping in the future. The picture below shows how the sanding will create a little bit of dust on your piece, but you aren’t going to be removing any of the finish, we will be painting over all that.
  3. Sanded BookshelfAfter you’ve sanded the entire thing, wipe the piece down with a damp cloth to get rid of all that dust.
  4. Prime. Using the Zinsser B.I.N. primer, paint or roll on the primer. This stuff dries quickly, so work fast and try to make your strokes as even as possible. The more uneven, the more visible the primer will be through your first coat of paint. Which reminds me, this particular primer can be tinted! Yup, how awesome so if you are using a darker color, just have the hardware store tint your primer so you don’t have to worry about white showing through (although tinting is not necessary, it does make it easier).
  5. Once your primer is dry you can use your 220 grit sandpaper to sand down the entire piece. Note that you aren’t trying to remove any of the primer, you are just lightly sanding to give your piece that “smooth-to-the-touch-feel.” Get it nice and smooth and wipe off any dust that sanding has created.
  6. Whoo hoo! Now you can paint. Remember, you have choices here, you can spray your paint with a spray gun, use a nice brush (one that goes with the type of paint you are using) or you can use a roller. I prefer a spray guy. I use the Graco Truecoat Plus II and I LOVE it!
  7. Do a few coats, allowing your paint to dry the recommended amount of time in between coats.

Here is the final bookshelf – I know it seems weird to just paint it white, but this particular piece matched my customer’s wall perfectly, so it looked like it was a built in, it turned out really nice.

Final Bookshelf

and smooth!

Smooth Shelf

I also used the exact same steps to personalize a dog bowl for some of our great friends. I love how their sweet dog Cin Cin now has a custom bowl that is like no other!

Cin Cin Bowl Before

Cin Bowl After2

Cin Bowl After

I’d love to see some pics from some of the furniture you’ve personalized with paint!!

Continue Reading

A Fancy French Provincial Desk

French Provincial Desk After

Oh my goodness, I was so happy to have found this gorgeous little sassy desk on craigslist,  I see french provincial pieces from time to time, but they are usually too expensive for my taste, so when I saw this pop up right in my range, I snagged it right away. The thing with these french provincial pieces are they truly can go into any room and just spruce it up. The desk was a little dull when I got it, but I decided to go simple on this piece and just let the lines speak for themselves. I used Annie Sloan Chalk Paint in Old White using my Chalk Painting Process and the original hardware sprayed with a dark silver and brushed lightly with Old White.

French Provincial Desk Before

French Provincial Before Drawers

French Provincial Desk After

French Provincial Desk Drawers After

French Provincial Desk redone by Happy Chapter

What do you think? This piece sold before I even listed it, but if I had it for a minute, it would have gone just beautifully in our guest room. Where would you place it?


Continue Reading

Sprucing Up Old Drawer Pulls

Dresser After by Happy Chapter in Annie Sloan French Linen

Howdy! So I have to start this one saying, shame on me for not taking enough before pictures. It’s really hard to show you a transformation without the before’s, but I’ll do my best. I was really excited to work on this dresser, because I knew just what I wanted to do with it, but the most fun was creating a fresh fun look for the drawer pulls.

Dresser Upcycle - Before Picture

Here is what I started with…not so much, right?! (Sorry about the horrible photo, only one I took) This was just an old dresser I found at Goodwill, it had great bones and just needed to be cleaned up, so I did it! Take a gander at the drawer pulls, they really were in pretty good shape, they just needed some cleaning up and a little love so I decided to keep them instead of replacing them. I popped into my favorite place, Hobby Lobby and looked for a nice spray paint and some Rub n’ Buff. I decided on a Krylon color called Antique Bronze, I thought it would look gorgeous and offer just enough contrast from the Antique Gold Rub n’ Buff. If there isn’t a Hobby Lobby near you, any craft store should carry it, or you can grab it on Amazon here.

Krylon Antique Bronze Spray Paint and Rub n' Buff in Antique Gold

First I sprayed all of the pulls and waited about 25 minutes for them to dry. Once they dried, I applied the Rub n’ Buff. It was so easy to apply, you just take your pointer finger and put a little of the Rub n’ Buff cream on it and rub on the pulls where you want it. I love the way it makes the drawer pulls look new and refreshed, but antique at the same time. Does that make sense? Ha!

Spray Painted Drawer Pull Happy Chapter

Rub n Buff CreamThe Rub n’ Buff dries super quickly, so pretty much as soon as it’s on, it starts to dry and will be ready to handle in about 5 minutes.

Updated Drawer Pull Happy ChapterOnce all the fun was done with the drawer pulls, I finished up distressing and waxing the dresser. I had painted it using my Chalk Painting Process earlier with Annie Sloan’s French Linen.

Dresser After by Happy Chapter in Annie Sloan French Linen

An Updated Drawer Pull - Happy Chapter

An Updated Dresser - Happy Chapter

I think the color of the dresser goes just wonderfully with the drawer pulls and I always love using the original hardware. Don’t you just love that Rub n’ Buff?


Continue Reading

A Glossy Painted Desk

Vintage Desk redone to a Glossy Hollywood Regency style

OK OK, I’m on a glossy furniture kick, I just have this attraction to these shiny lacquered looks and I just want to recreate them over and over again. Lucky for me, I found this awesome desk at a garage sale in my neighborhood and as soon as I saw the lines on it, I knew exactly what I wanted to do with it.

Glossy Painted Desk Before Image

The desk kind of reminded me of a piece of furniture I had pinned from Z Gallerie. I loved how it kind of had that Hollywood Regency look to it. I was drawn to these images and knew this desk could pull this look off!

Z Gallerie Dresser

Z Gallerie Styled Room

The desk had a super dark stain and had this terribly thick waxy sealant on it, so the sanding job was a nightmare, but I got through it. I had to get a circular sander, but it made the project move along much faster. 

After sanding, I used my spray gun (The Critter) and painted on a gorgeous bright white oil based paint from Rustoleum. It took what felt like millions, but was actually only 3 coats to make it look as glossy and smooth as I wanted. I used a 220 grit sanding block in between coats to make sure I got it as smooth as possible; the circular sander can be pretty rough on furniture and softer woods. I decided to use the old hardware because I thought it was still pretty cute, I just sprayed it with a brass spray paint and I like the end look. If you know anything about oil paint, it’s that it takes a reeeeeeally long time to dry! So this project took forever, but I am so happy with it, I think I may keep the desk to put in our guest bedroom. If you have back, hip, neck or shoulder issues, a body pillow amazon can help you find pressure relief by offering extra support. Body pillows can also help you fall asleep faster by easily helping you find that perfect sleep position.

Vintage Desk redone to a Glossy Hollywood Regency style

Vintage Desk Drawer Pull

Vintage Desk, Glossy Top

Vintage Desk


Continue Reading

The Annie Sloan Chalk Paint Revolution – What’s this about?

I don’t know about you, but I have been hearing raves and praises about Annie Sloan Chalk Paint quite frequently, so I was over the moon when a girlfriend of mine commissioned me for a “Shabby Chic Distressed Trunk.” From what I have heard, this chalk paint would be just the right way to create the exact look she was going for.

This paint is sold all over; the website has a list of locations. It is a bit pricey so expect to pay a little more than normal for paint, but when you consider all the time you save by not sanding, or prepping, or priming, you’re probably coming out even, or actually a little bit ahead! Yes, that’s right, no sanding…whoo hoo!!

Here’s what you need:

  • Annie Sloan Chalk Paint in Pure White
  • Any paint brush of your choice. I used this one I already had on hand.
  • A color free, lint free cloth. You can buy some or use an old t-shirt (I like the t-shirts).
  • Annie Sloan Clear Wax. She also makes a Dark Wax, which will give a completely different look.
  • Sandpaper for distressing (I used 80 grit, but that really depends on how much you want to distress)

Before Trunk

Step by Step:

  1. Wipe down piece and remove all hardware.
  2. Paint! The paint goes on super smooth and goes a long way. Annie Sloan recommends 1 1/2 coats, so you may see some brush strokes and bleed through on first coat. The paint takes about 15 or so minutes to dry, so I was able to move right into my second coat. 1st Coat
  3. Once the 2nd coat is dry – Wax with clear wax. The wax is wonderful, it’s like Crisco. I applied a small amount in a circular motion with one side of my t-shirt and then wiped it off in the same direction of brush strokes with the dry side of my t-shirt. Don’t go crazy with the wax, a little is all you need, Annie Sloan says to think about it like  putting lotion on, not too much and you want it to soak in.
  4. Distress, love this part. I waited for the wax to dry 24 hours before distressing. Then you just sand in places where natural distressing would happen and then anywhere you want for the look you are going for. Wipe off all dust afterwards.
  5. Last Step! Wax again! This is just to make sure that your piece remains protected for many moons. Let sit 24 hours before you start use of your piece. This is also where you would apply the Dark wax if you decided to use that one.

Voila! There you go. Check out this fun trunk. I definitely see more Annie Sloan paint projects in my future!

Annie Sloan Pure White Chalk Paint Shabby Chic Trunk


Continue Reading

Thrifting and Inspiration in New Orleans

Vintage Wooden Trunks Chests

You know, sometimes a little trip with new scenery is just what you need to get the creative juices flowing. Last week, my husband had a conference in New Orleans, LA and I tagged along to roam on my own and peruse all of the fine antiques and art New Orleans has to offer. Boy I soaked it up and it was a blast (I can be inspired by anything, food, art, good music – you name it). I’m home now ready to tackle all kinds of new projects, I just wish we had driven and I would have brought home like 1,000 pieces of furniture. Take a look at some of the gems I found and the places that I thought are worth visiting again and again and again…

I do a lot of research on Trip Advisor when I travel, I had read about this place and knew I needed to make a stop.

Greg's Aniques Sign

The people were so nice and chatted me up for a minute! The great thing is they actually deliver to surrounding states, it’s a little pricey, but in case you find something you can’t live without, it’s a great thing. I also saw these beauties here.

Vintage China Cabinet

Great Antique Hutch

and trunks galore all at reasonable prices.

Vintage Wooden Trunks Chests

Uuuuuh, I want it all. I loved that place and will certainly stop in next time I go.

I wandered through several shops in the French Quarter which were a pleasure, but much more expensive than what I would buy. I did see some beautiful things however, that I definitely want to keep in mind when I am reupholstering and looking for unique pieces. I just loved these chairs and this little dresser.

Nailhead Upholstered Chairs

Antique Small Dresser

I also fell in love with the streets and homes here. New Orleans is just “anything goes” when it comes to picking your home paint colors, and the French inspired architecture is just amazing!

New Orleans Colorful House

Gorgeous Stairs

If you head to New Orleans anytime soon, try to make a stop at the places below, they really are great little stores and the people are wonderful!

Greg’s Antiques for wonderful furniture at inexpensive prices.

Rare Finds for a little touch of your Grandparent’s attic – Talk with Deana, she’s a treat!

For sure stroll down Magazine Street, and stop into A.K.A Stella Gray, Ben was so nice and they have a super cool eclectic style going on in that store!

Any others that I’ve forgotten? Where are your must-go-tos in NOLA?


Continue Reading

It’s a Cowgirl Y’all – Western Themed Baby Shower

Western Baby Shower Food Names

I am so happy to say that I am super lucky to have another little niece on the way (I have 5 already and one simply adorable nephew). My sister and her husband are expecting their sweet little bundle in April and my Mom and I couldn’t have been more excited to throw them a baby shower. The theme was “It’s a Cowgirl Y’all” and that was a blast. My sister requested “no pink” so I went with a Turquoise and Red pallet and I love the way it turned out. I designed the invites using Photoshop and purchased a few fun images from Etsy to use on the invite as well.

Cowgirl Baby Shower Invite

Baby Shower Wreath

Western Baby Shower

We had a “Sassy Sangria” and some delicious sweet tea for refreshments. I used free online template for the water bottles and just designed them with Photoshop as well.  Super easy.

Water Bottle Label for Baby Shower

My sister isn’t really into the game thing, so we had some diapers that people could write funny messages on for Mama and Daddy-to-be for later, they were hilarious and everyone had a ton of fun with them.

Cupcakes and Diaper Game

Baby Shower Chalkboard

I had fun naming all of the food, I got a lot of the ideas from this party on Pinterest, and the names (and the snacks) were a hit!

Western Baby Shower Food Names

It's A Cowgirl Y'all Table Banner Baby Shower

Trail Mix Party Favors

I think everyone had a lot of fun and it was a super easy no-fuss kind of baby shower, perfect for my sister and brother-in-law and little Baby Franse!

Sister

Continue Reading

Inspiration Station

Floral Fabric Upholstery Chair

I don’t know about you, but I love to stare at photos for inspiration (as I imagine we all do, right? That’s what Pinterest is all about…) But, sometimes when I get a new piece to start on, I just get overwhelmed with all of the options of amazingness that can happen with it. I have the hardest time committing to an idea, so what I like to do is look at pictures and get inspired by the things that make my heart sprinkle the most. I just found a perfect little sitting chair, and I have sooooo many ideas. I thought I’d look at some of the most beautiful pieces I’ve seen lately to get narrow down my project plan. I’m loving these, what do you think??

Fun Fabric Chair Upholstery

A fun chair from Third + Grace

Floral Fabric Upholstery Chair

No link to this beauty.

Big Geometric Textile Upholstery Fabric Chair

A great fun chair from Wild Chairy

WildChairy2

A sassy geometric print from Wild Chairy

Whoooo – I feel like I’m ready to start after looking at all of these gorgeous options. I’ll definitely share what my little chair turns out like asap! How do you get inspired?

A good computer chair for long hours provides proper lumbar and pelvic support which results in your back muscles being less stressed. With lumbar and pelvic support comes better posture, better breathing, and less fatigue, so do yourself a favor and give your work chair a good hard look and see how it measures up. In this view the most important function of a chair is to help one find and sustain such a posture. Note that this posture can change minute to minute or even moment to moment, which makes this a big ask of one’s chair. Unless one has an active chair, that is, a chair that adapts in real time to postural changes.


Continue Reading