How & Why to Chalk Paint your Bathroom or Kitchen Cabinets

When we moved into our new house, all of the cabinets were in their natural form, no stain or paint. Definitely not anything wrong with that, just not my bag, if you know what I mean. I had to do something to make them mine. Saw these ideas on https://kingstoncabinetry.co.uk/ and definitely needed to try it out for my house.

How and Why to Chalk Paint Cabinets by Happy Chapter

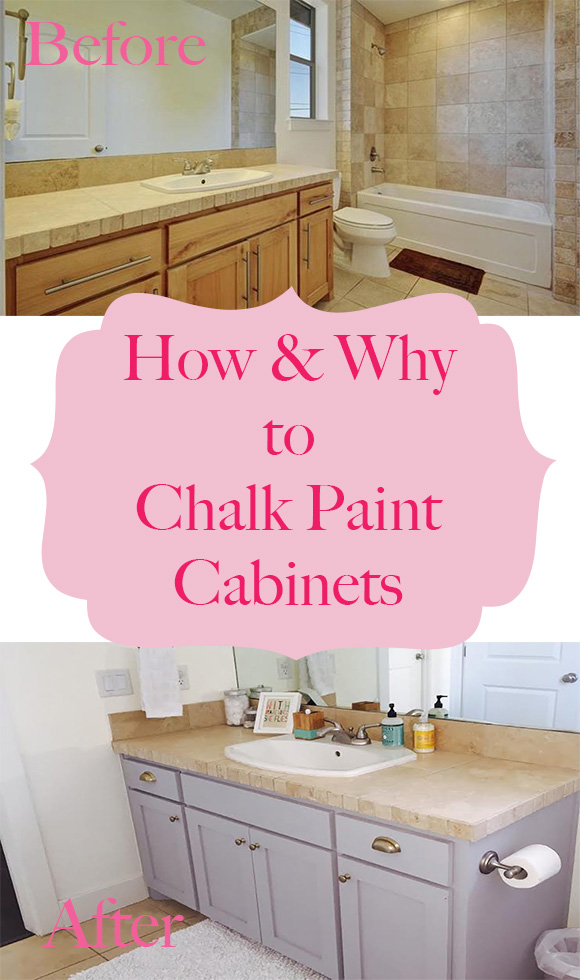
We have these awesome shaker cabinets, so I knew they didn’t need to be replaced, it would just take some DIY painting, and I can handle that! Mark and I spent many moons, like literally 14, painting our kitchen cabinets, sanding, priming, sanding, painting, sanding, painting…you get it. I loved the way they turned out. But that’s not the process I had in mind for our bathrooms. Also think about installing a shower door with 90 degree return panel to get your bathroom more organized and add a fresh look.

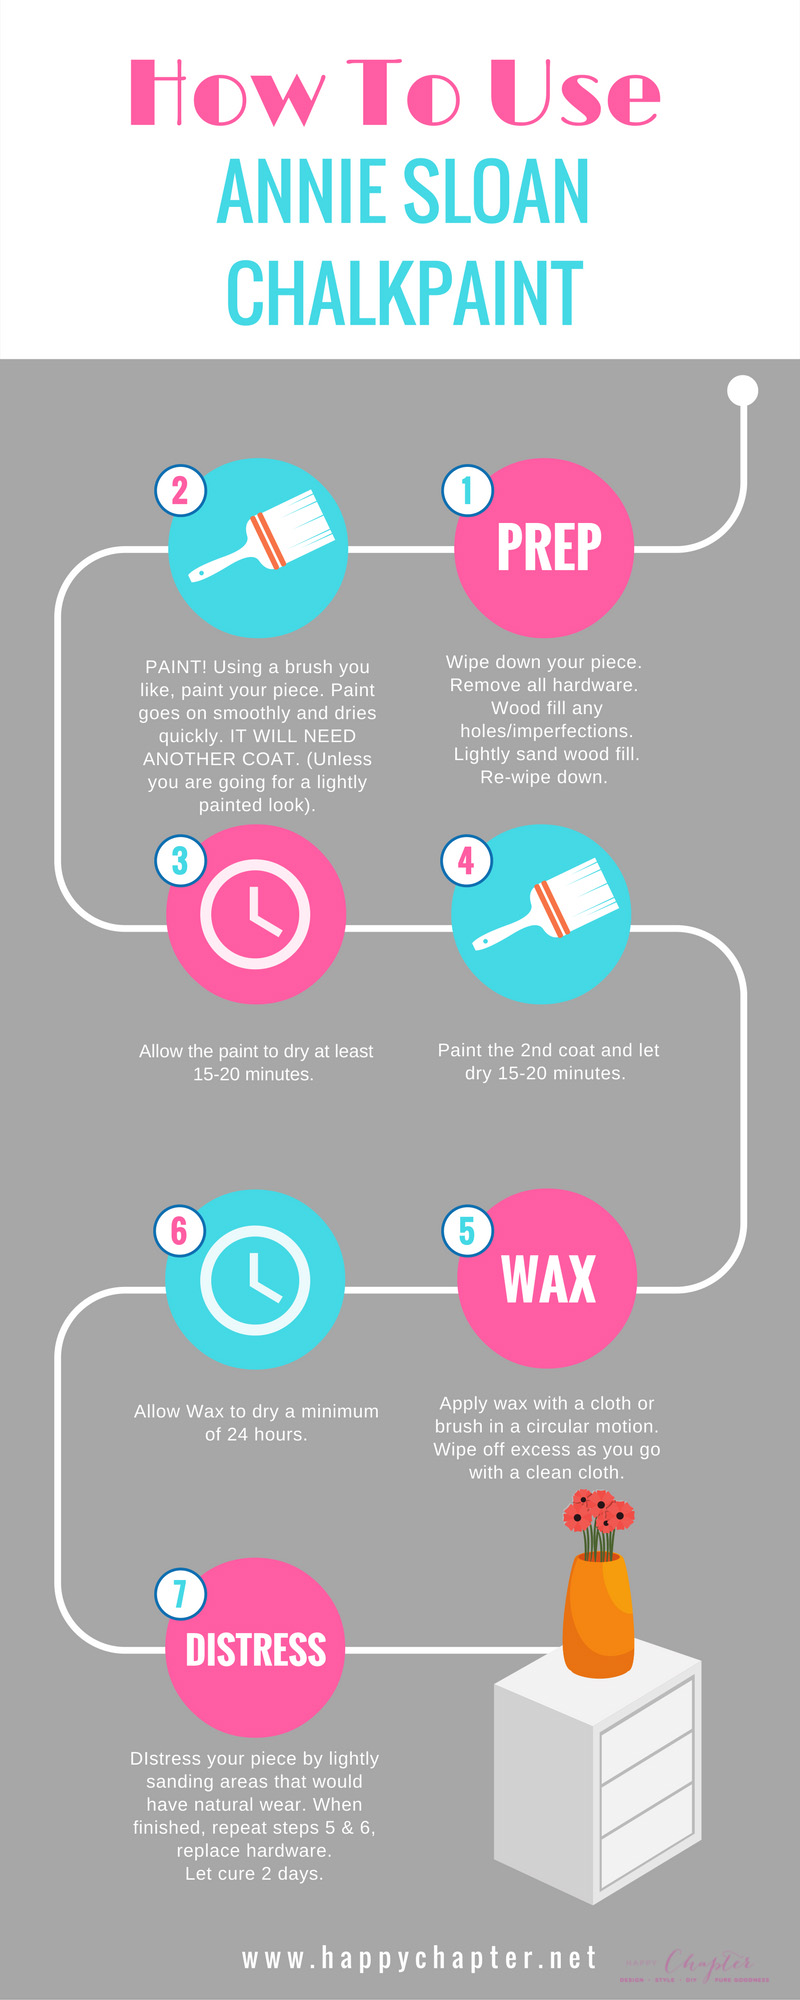
We have a little beansprout and I just don’t have a lot of extra time on my hands, so I needed a better solution. I’ve painted a TON of furniture with Chalk Paint, but never cabinets, so I wasn’t sure, and I also wanted to add some paintings and murals from the best Murale Design online to create a good vibe in the room. But I tried it, and SUCCESS!! I have created a fancy little infographic for the process, but I want to share a little more info since these are cabinets and not your regular ol’ furniture project. Here’s how it all went down.

Supplies to Chalk Paint Cabinets by Happy Chapter


1. Annie Sloan Chalk Paint in Paris Grey 2. Wood Filler 3. Wooster Paint Brush 4. Polycrylic 5. Ikea Knobs and Pulls

Step by Step:

  1. Remove all old hardware and fill any holes you won’t need with your replacement hardware.
  2. Sand the wood filler nicely, so its nice and smoooooooth.
  3. Wipe down your cabinets, some of these bathroom and kitchen cabinets have GUNK! I just used Dawn dish soap and warm water on a rag and that did the trick.
  4. Remove the doors from their hinges and pull the drawers out.
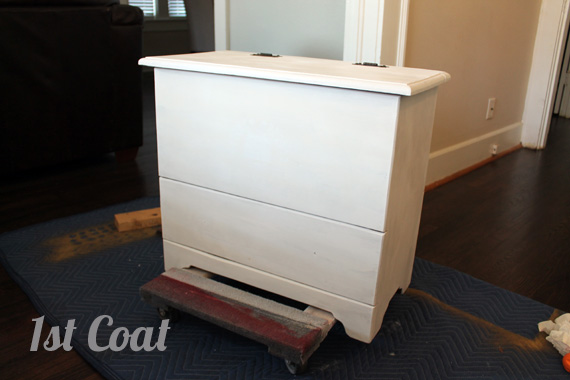
  5. PAINT! The first coat
  6. Allow the paint to dry, it dries pretty quickly. I waited about 20 minutes after I finished and began the 2nd coat in the same spot I began last time.
  7. Allow the paint to dry/cure at least 24 hours.
  8. Seal with a clear coat sealant. I wouldn’t suggest wax on cabinets. The wax isn’t the best for wiping and water and all that goodness you experience with bathroom cabinets. I used a Polycrylic, that you paint on. Easy as pie.

How and Why to Chalk Paint Cabinets by Happy Chapter

How and Why to Chalk Paint Cabinets by Happy Chapter

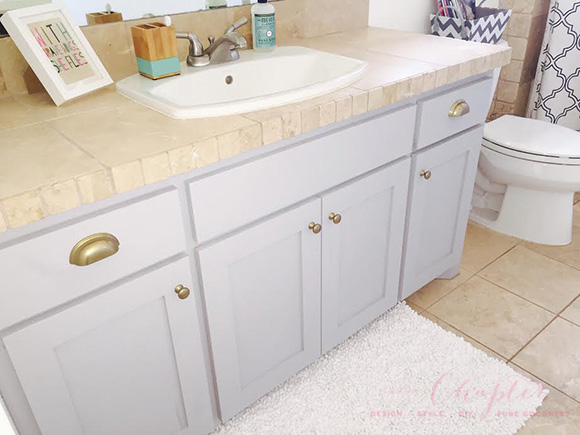
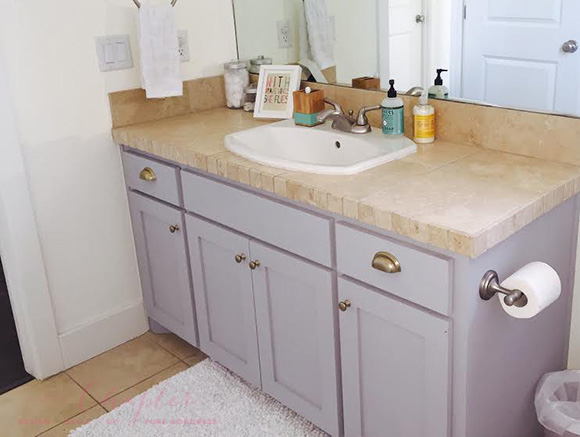
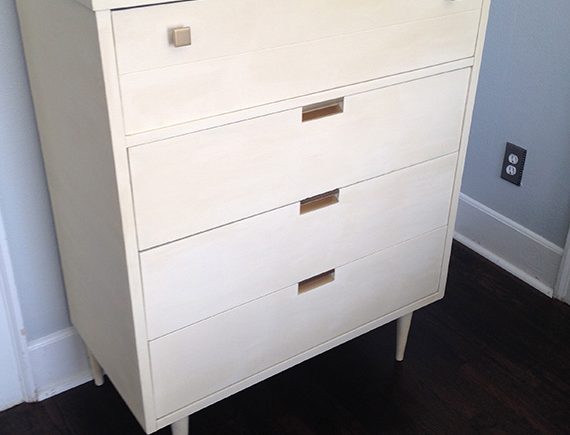
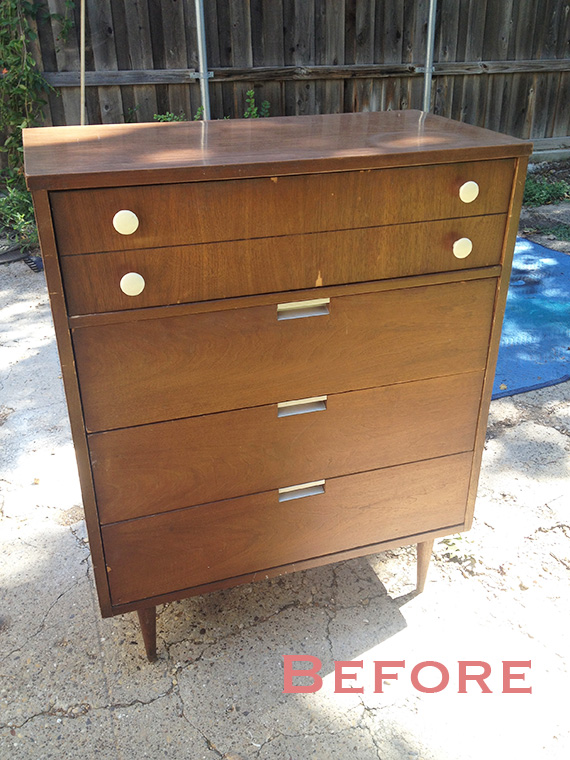
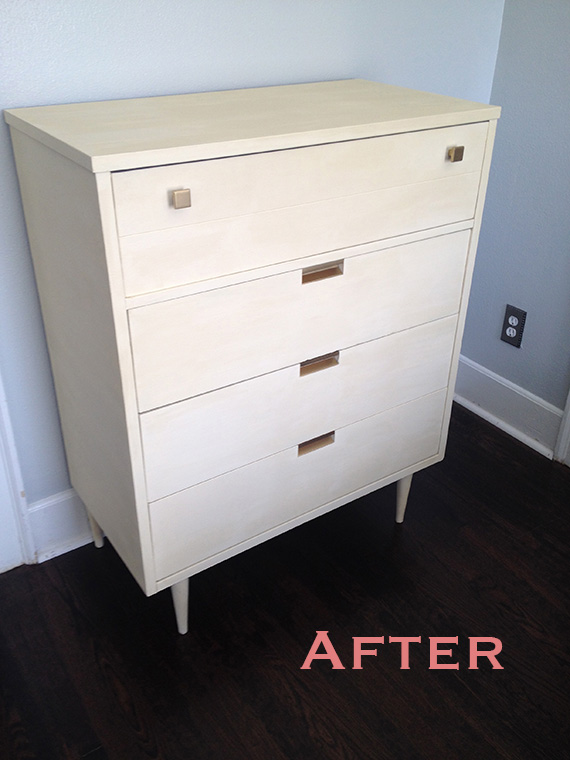
The entire process took like 2 days and that was mostly because I had to let the paint cure. So, why would you want to chalk paint your cabinets? Because it is a quick and cost effective way to make a change. A big awesome change that I made in my bathroom and my kitchen, which was an amazing change as I love cooking all the time with recipes from sites like Kitchenbar.net. I definitely could live without that tile countertop in the bathroom, but the painted cabinets make it way more bearable and I love the bathroom now (especially with the new art I made for the wall)!  Some day a new countertop will happen… Anyway, what do you think? Would you try it?

Continue Reading

To Paint or Not to Paint? A Mid Century Modern Dresser fit for a Princess

Mid Century Painted Dresser by Happy Chapter

When I saw this dresser at a garage sale, I’d felt like I won the lottery. I guess I’m a sucker for old beat up stuff. Please don’t hate me for painting this beauty, but I saw it and I had a vision.

A Midcentury Dresser Before redo by Happy Chapter

The dresser wasn’t in the greatest shape and needed some love. I needed to refill some areas, and there was plenty of torn veneer, so it would have been quite a mission, not to mention pretty expensive, to restore it to the original look anyway. I love commas. ANYWAY…I was a little uncertain about using chalk paint on something mid century modern, but I was looking for a flat matte look and knew the ol’ Annie Sloan chalk paint would do the trick. Plus HEY! No Sanding, No Priming. I’m in!

After I cleaned and filled holes and any damaged areas with wood filler, I used Annie Sloan chalk paint in Old White using this step by step painting process. Next, I shined up the original drawer pulls, but decided they needed an extra umph! and painted them with Rustoleum Metallic spray paint in Pure Gold to match some super sleek square knobs I found for the top drawer. I’m in love with the final look.

Mid Century Painted Dresser by Happy Chapter

Mid Century Painted Dresser by Happy Chapter

A very close friend of mine purchased this piece for her little girl’s “A Woodland” themed nursery and it looked just perfect in there. Take a look at this interior painting Mckinney company that can help you out with the best quality materials.

Mid Century Painted Dresser by Happy Chapter in Woodland Theme Nursery

So tell me, would you do it? Do you think you could paint an oldie like this?

Continue Reading

The Annie Sloan Chalk Paint Revolution – What’s this about?

I don’t know about you, but I have been hearing raves and praises about Annie Sloan Chalk Paint quite frequently, so I was over the moon when a girlfriend of mine commissioned me for a “Shabby Chic Distressed Trunk.” From what I have heard, this chalk paint would be just the right way to create the exact look she was going for.

This paint is sold all over; the website has a list of locations. It is a bit pricey so expect to pay a little more than normal for paint, but when you consider all the time you save by not sanding, or prepping, or priming, you’re probably coming out even, or actually a little bit ahead! Yes, that’s right, no sanding…whoo hoo!!

Here’s what you need:

  • Annie Sloan Chalk Paint in Pure White
  • Any paint brush of your choice. I used this one I already had on hand.
  • A color free, lint free cloth. You can buy some or use an old t-shirt (I like the t-shirts).
  • Annie Sloan Clear Wax. She also makes a Dark Wax, which will give a completely different look.
  • Sandpaper for distressing (I used 80 grit, but that really depends on how much you want to distress)

Before Trunk

Step by Step:

  1. Wipe down piece and remove all hardware.
  2. Paint! The paint goes on super smooth and goes a long way. Annie Sloan recommends 1 1/2 coats, so you may see some brush strokes and bleed through on first coat. The paint takes about 15 or so minutes to dry, so I was able to move right into my second coat. 1st Coat
  3. Once the 2nd coat is dry – Wax with clear wax. The wax is wonderful, it’s like Crisco. I applied a small amount in a circular motion with one side of my t-shirt and then wiped it off in the same direction of brush strokes with the dry side of my t-shirt. Don’t go crazy with the wax, a little is all you need, Annie Sloan says to think about it like  putting lotion on, not too much and you want it to soak in.
  4. Distress, love this part. I waited for the wax to dry 24 hours before distressing. Then you just sand in places where natural distressing would happen and then anywhere you want for the look you are going for. Wipe off all dust afterwards.
  5. Last Step! Wax again! This is just to make sure that your piece remains protected for many moons. Let sit 24 hours before you start use of your piece. This is also where you would apply the Dark wax if you decided to use that one.

Voila! There you go. Check out this fun trunk. I definitely see more Annie Sloan paint projects in my future!

Annie Sloan Pure White Chalk Paint Shabby Chic Trunk


Continue Reading